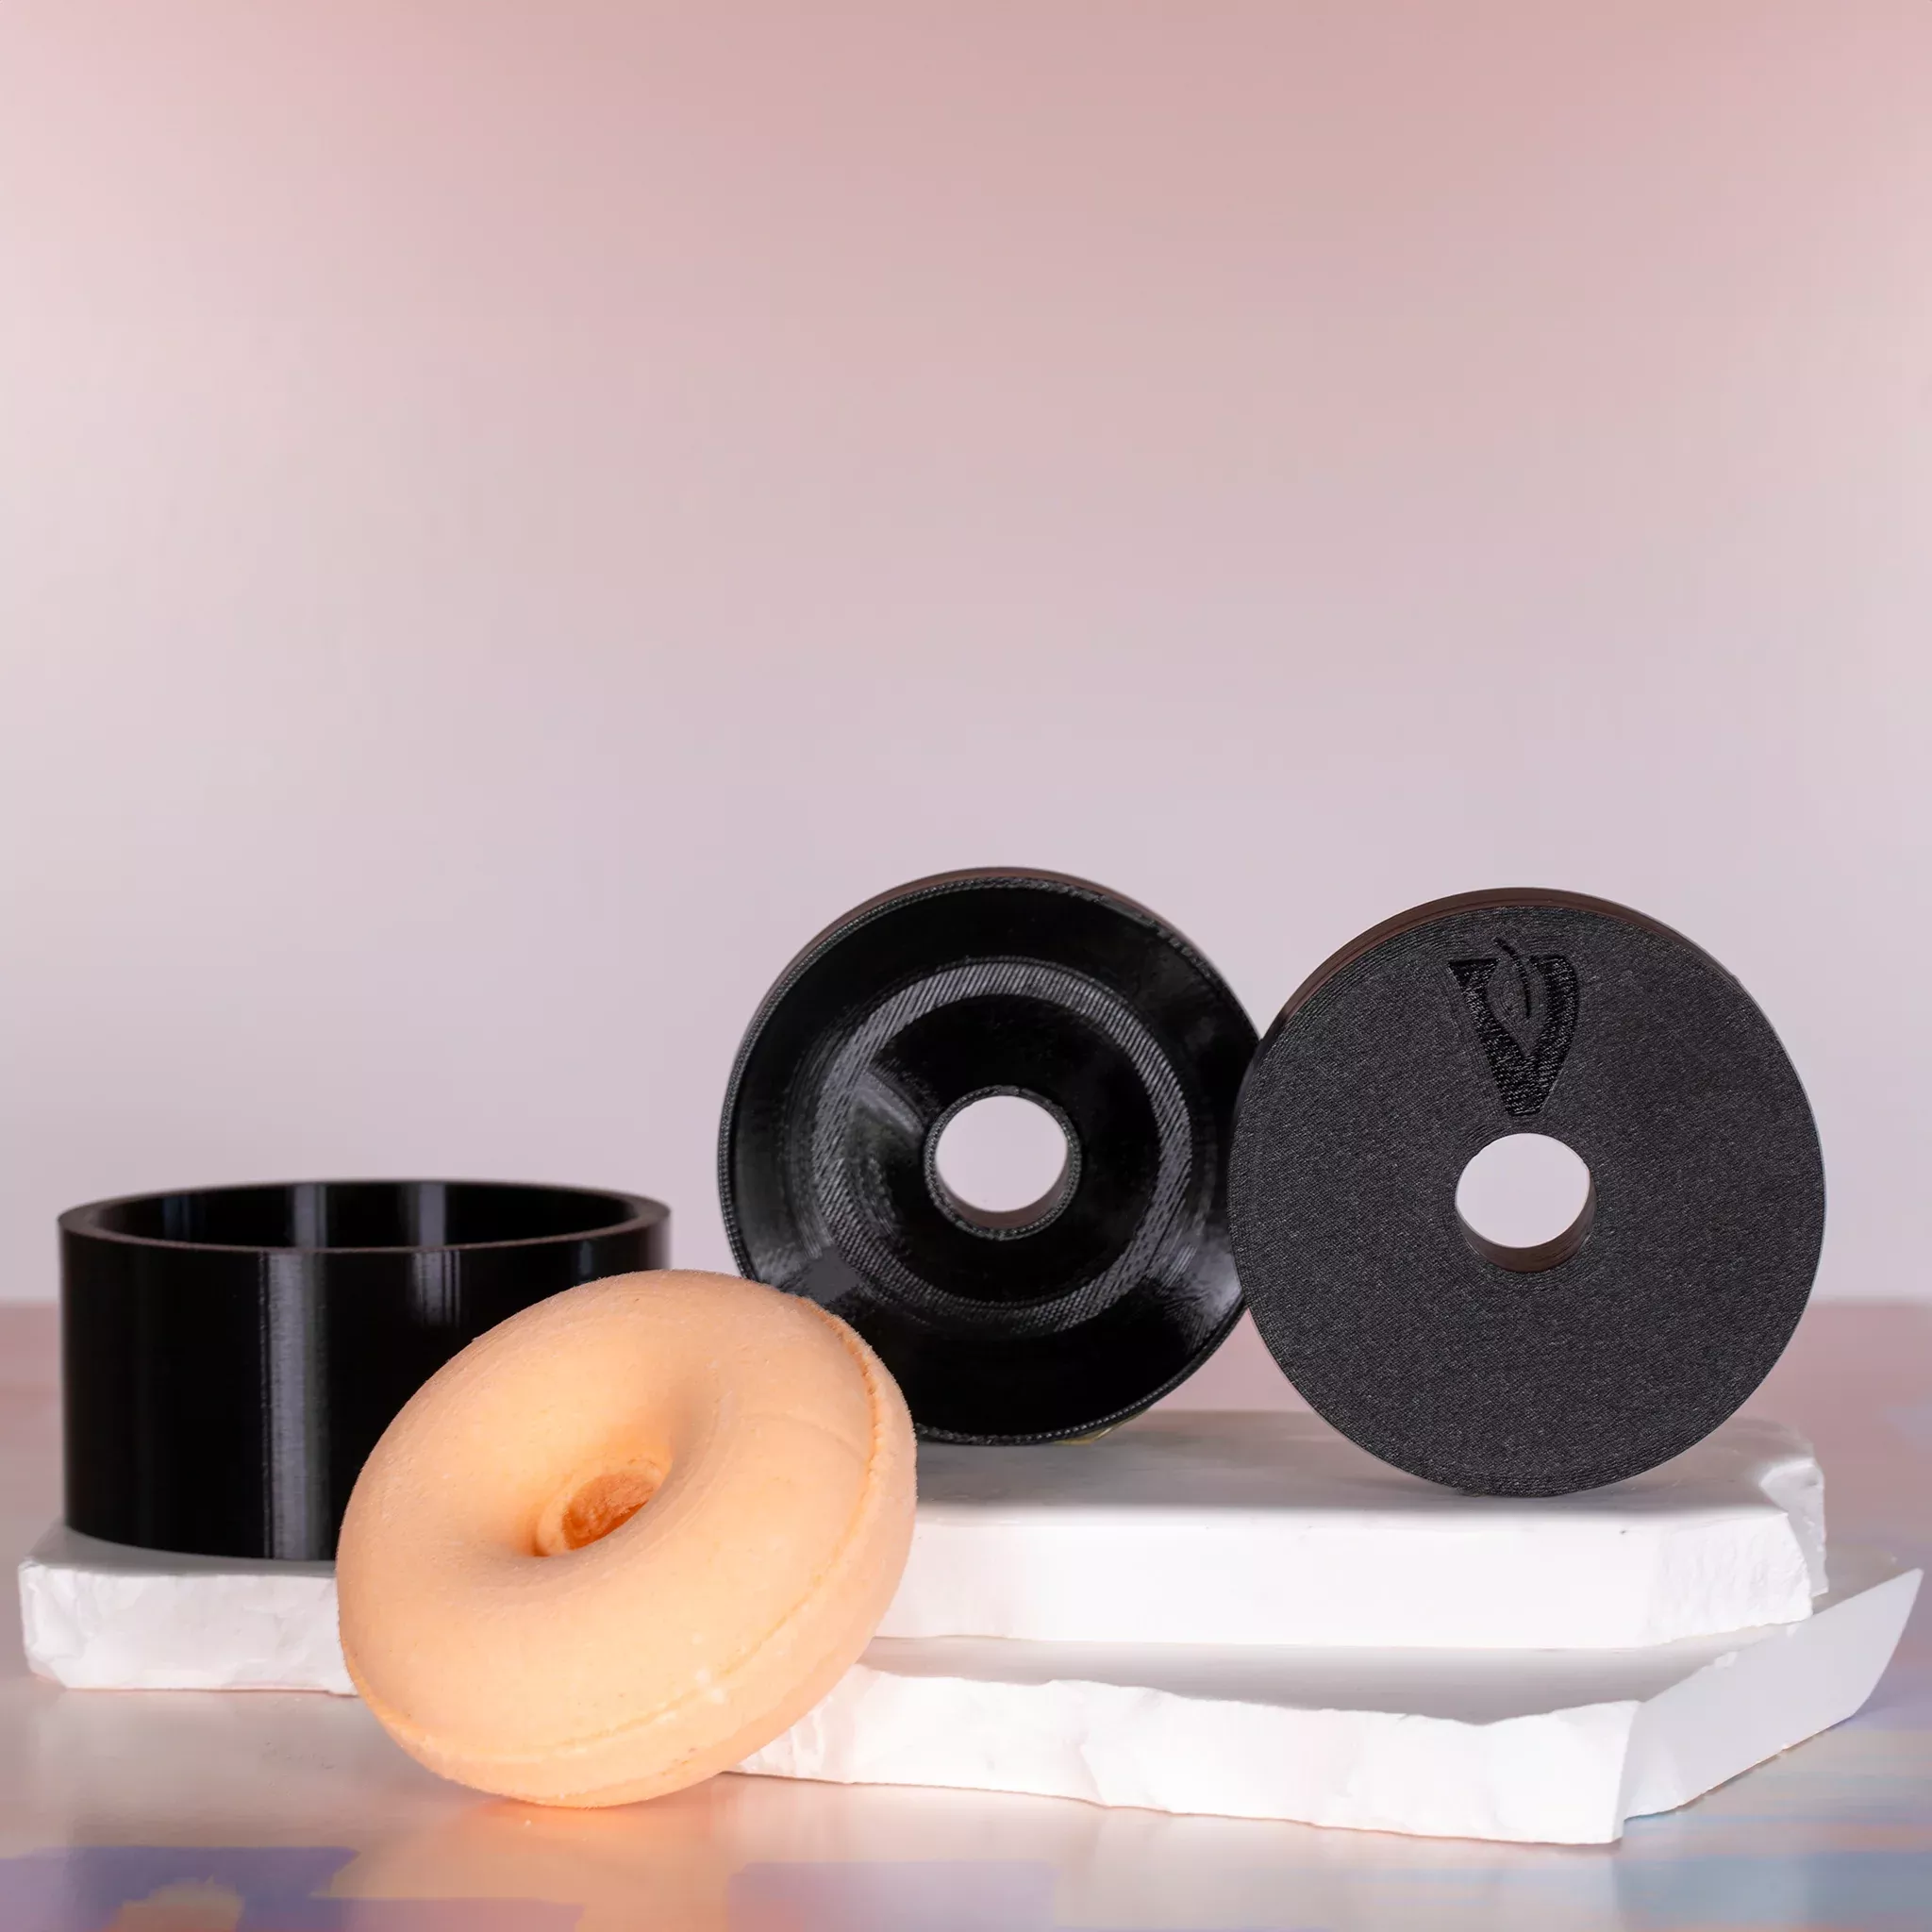
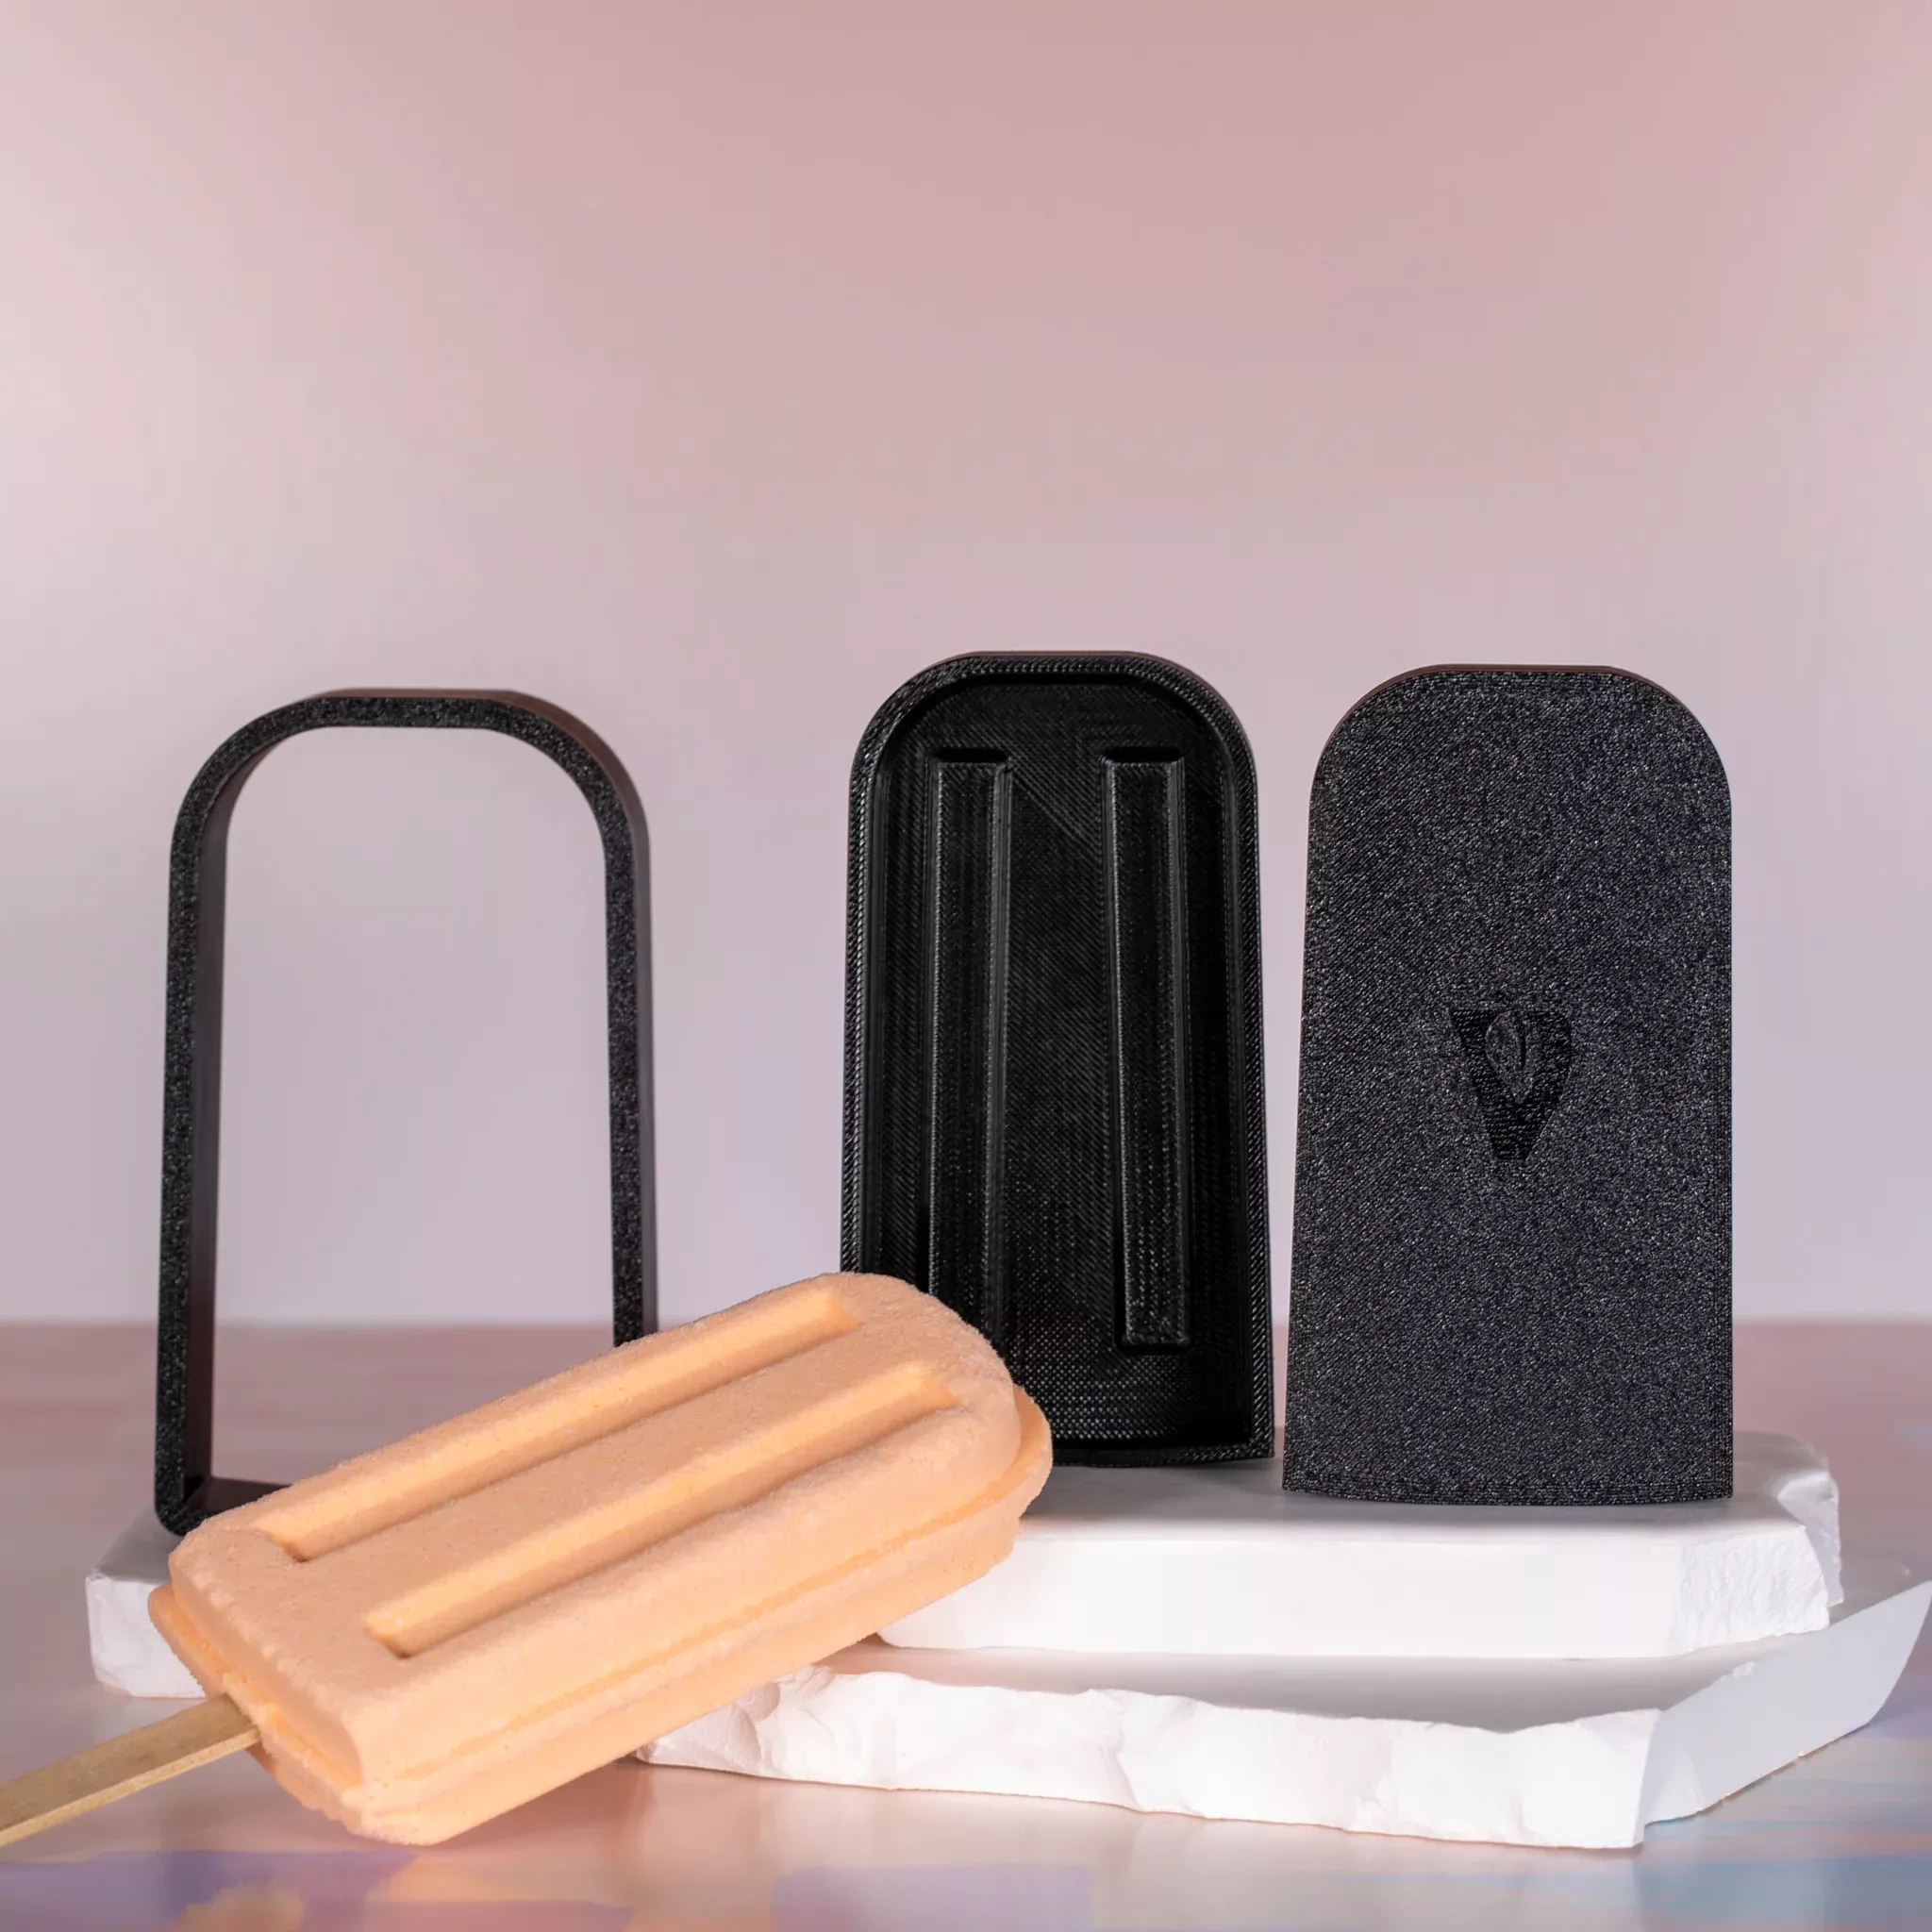
Ice Pop – 3D Printed Bath Bomb Mold
Original price was: $25.20.$19.94Current price is: $19.94.
56 in stock
Description
How to Use 3D Printed Bath Bomb Molds1. Prepare the Mold:
- Ensure your sleeve is on a flat surface, such as a table.
- Put the bottom piece of the mold into the outer sleeve.
2. Fill the Mold:
- Fill the mold up to the top of the sleeve with your prepared bath bomb mixture. Do not pack it in tightly; just level it off.
TIP: If you want to place items like dried flowers or coarse salts in your bath bomb, and have them visible at the top of the finished product, use the mold half with the embossed Voyageur Logo in the bottom of your sleeve. First, sprinkle the flowers or salt into this mold half before adding the bath bomb mix. The embossed logo (the “V”) will help you identify which side of the bath bomb will have the embeds.3. Compress the Bath Bomb:
- Place the top half of the mold into the top of the sleeve and press down firmly to compress the two halves together and to create a tight seal.
4. Remove from the Mold:
- Gently move the sleeve up and down to help release the bath bomb. There may be a bit of suction between the sleeve and the mold halves, which can be easily relieved by tapping the sides of the sleeve with the back or side of a metal spoon.
- Once you tapped a few times against all sides,place mold on the table and push the sleeve up to remove.
INSERT THE POPSICLE STICK: After removing the sleeve, should you wish to insert a popsicle stick into the bath bomb, securely hold the mold together as you push the popsicle stick through the opening at the bottom of the assembled mold. Once the stick is inserted, you can immediately tap the top half of the mold to release suction, and remove. Then, carefully holding the ice pop, turn the mold over, and lay the exposed surface of the bath bomb onto a flat surface such as a piece of cardboard or table. Next, tap the remaining half to release suction, and remove.See below section 5. for full instructions on Releasing the Bath Bomb
5. Release the Bath Bomb from the 2 halves:
- Use your thumb or index finger to smooth out the exposed ring of the bath bomb.
- Gently tap the top part of the mold with the side of a metal spoon while firmly holding the mold to break the suction.
- Carefully pull the top part of the mold diagonally upward to remove it.
- Next, while gently holding the exposed part of the bath bomb, turn it upside down and place on a flat surface.
- Repeat the process to remove the bottom half of the mold from the finished bath bomb.6. Dry and Package:
Lay the bath bombs onto a flat surface, such as a piece of cardboard for 24 hours to fully dry before packaging.
Related products
-
- Sale!
- Body & Soap Supplies, Candle Supplies
Sleigh Ride Fragrance Oil
- Original price was: $4.23.$2.83Current price is: $2.83.
- Add to cart
-
- Sale!
- Body & Soap Supplies, Candle Supplies
Butterfly Orchid Fragrance Oil
- Original price was: $4.18.$2.57Current price is: $2.57.
- Add to cart
-
- Sale!
- Body & Soap Supplies
Pumpkin Seed Oil
- Original price was: $5.15.$3.99Current price is: $3.99.
- Add to cart
-
- Sale!
- Body & Soap Supplies
Comfrey Leaf C/S
- Original price was: $5.32.$3.47Current price is: $3.47.
- Add to cart
-
- Sale!
- Body & Soap Supplies
Spirulina Powder
- Original price was: $11.16.$6.72Current price is: $6.72.
- Add to cart
-
- Sale!
- Body & Soap Supplies, Candle Supplies
Sweet Orange Fragrance Oil
- Original price was: $3.73.$1.96Current price is: $1.96.
- Add to cart
-
- Sale!
- Body & Soap Supplies
Small Black Spatula
- Original price was: $4.88.$3.27Current price is: $3.27.
- Add to cart
-
- Sale!
- Body & Soap Supplies
Jojoba Oil Clear
- Original price was: $4.62.$2.47Current price is: $2.47.
- Add to cart